Bury St Edmunds Tile Cleaning

Bury St Edmunds Tile Cleaning

Welcome to my Work History archive where you will find examples of the cleaning and renovation of tiles carried out in Bury St Edmunds.

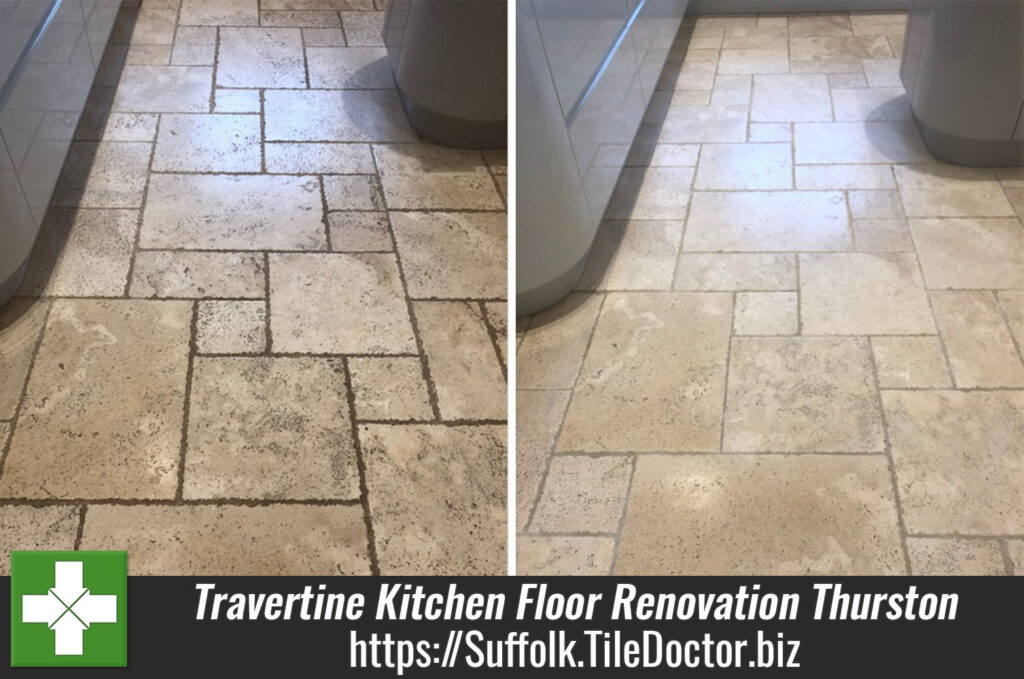
Travertine Kitchen Floor Tiles Before After Cleaning Thurston

Failed Travertine Tile Sealer Resolved in Great Green, Thurston

The pictures below are of a Travertine tiled floor installed in the large Kitchen of a barn conversion in the small village of Great Green near Thurston which is four miles from Bury St Edmunds. The floor had been laid ten years prior and the customer was now finding it increasingly difficult to get the tile and grout clean.

Travertine Floor Before Cleaning Great Green Thurston

I visited the property to survey the floor and quickly confirmed that the problem was quite clear, the sealant had been worn away over the years and now unprotected dirt was getting into the surface and pores of the stone. Once ingrained with dirt it becomes impossible to get them clean with everyday household cleaners. The floor was in the kitchen which being one of the busiest areas in the house so really needed to be protected.

Travertine Floor Before Cleaning Great Green Thurston

I ran a test clean on a small patch of travertine and they could see straight away the colour the floor should have been. It was clear the tile and grout would need a deep clean and then resealed however due to the inevitable wear I advised the customer stone floors like these really need continual attention and recommend that after the initial renovation they consider getting us back in once a year to do a surface clean and seal.

Happy with our test clean and quotation we got the go ahead to do the initial clean and seal and we arranged complete the work the following month.

Cleaning a Travertine Tiled Kitchen Floor

On arrival I first taped up the skirting boards and kitchen plinths to protect them from splashing during cleaning. The floor was then scrubbed with a strong dilution of Tile Doctor Pro-Clean which was first left to dwell for ten minutes so it could soak into the pores and break down the dirt. For best results I use a rotary buffing machine fitted with a black scrubbing pad. Pro-Clean is a multi-purpose tile and grout cleaning product that really gets to grips with ingrained dirt and grease as well as removing the remains of old sealer.

Scrubbing pads struggle to reach into the grout recesses so I scrubbed the grout lines by hand using a wire brush and more Pro-Clean. The resultant slurry was then vacuumed off the floor using a wet vacuum, the floor was then rinsed with water and vacuumed again.

To improve the appearance of the Travertine tiles further it was given a light burnish using a 400-grit then 800-grit diamond burnishing pad. These pads are attached to the rotary machine and then run over each tile several times using only water for lubrication. This action brings up the natural polished appearance of the stone to leave a mild sheen as per the clients’ request. After another rinse and extraction to remove the slurry generated during burnishing the floor was left to dry off overnight.

Sealing a Travertine Tiled Kitchen Floor

The following day I returned and first took some moisture readings from the floor using a damp meter. I needed to be sure the floor was dry enough to accept the sealer as applying sealer to a damp floor is not recommended.

The floor had dried out nicely, so I began the application of the sealer, Tile Doctor Colour Grow. This product is a colour intensifying impregnating sealer that penetrates the stone, occupying its pores, improving colour, and resulting in long lasting protection. I highly recommend this for use on Travertine and it enhances the natural brown colours in the stone beautifully.

Travertine Floor After Cleaning Great Green Thurston

The job took 2 days in total to complete and the clients were very happy with the result. For aftercare I have advised the use of Tile Doctor Stone Soap which will help maintain the patina whilst keeping the floor clean. I’ve also made a note to give them a call in a years’ time to discuss giving the floor a light Maintenance Clean and apply a new coat of Colour Grow.

Travertine Floor After Cleaning Great Green Thurston


Professional Restoration of a Travertine Tiled Kitchen in Suffolk

Failed Travertine Tile Sealer Resolved in Great Green, Thurston Read More »

Brick Tiled Floor Before After Renovation Thurston

Brick Floor in Barn Conversion in Great Green

Details below of large Brick tiled floor we worked on at barn conversion in the village of Great Green on the outskirts of Thurston. The floor had been laid fifteen years ago when the barn had been converted. The customer was now finding it almost impossible to keep the bricks clean. They also had two rather large husky type dogs and five smaller breeds that had all been rescued from various parts of the world.

I knew this would be a challenge as the bricks had not been sealed when they were first installed, so dirt was just going straight into the floor and getting embedded in the rough surface of the brick. I discussed with client the process we needed to go through, first cleaning the floor and then sealing it. I demonstrated my cleaning method on part of the floor, and they were impressed with the result. They agreed to my quote and we arranged a time to carry out the work.

Barn Conversion Brick Floor Before Cleaning Great Green Thurston

Deep Cleaning a Brick Tiled Floor

We cleaned the floor in sections using Tile Doctor Acid Gel which was brushed onto a 1m2 area of the bricks and then left for five minutes to soak in. It was then worked in using a rotary machine fitted with a scrubbing pad. The slurry was then vacuumed of the floor using our wet vac. The bricks were then rinsed using warm water and dried with microfibre cloths – this is a long drawn out method but is very effective on porous floors as not much water is used which results in less being absorbed into the brick.

The whole floor took a complete day to clean and was then left overnight to dry.

Sealing a Brick Floor

The following day I conducted a damp test to ensure the floor was dry enough to take a sealer. I was confident it would be due to the cleaning method we had used, and I was not disappointed.

The sealer of choice was Tile Doctor Seal & Go Extra this is an acrylic sealer which I like to use on brick. My reason for using this sealer is that it fills all the pores in the brick and provides a surface coating making the brick nonporous and therefore easier to clean as the dirt has nothing to grip hold of.

The floor was very porous and soaked up six coats of sealant before it was fully sealed. You have to let each coat dry before applying the next which I usually do with a paint pad and then wipe off what little excess there is with a microfibre cloth. This process took up much of the first day, but the result was transformational. My clients were overjoyed at the clean floor and happy they would now be able to clean their floor without shredding mops!

Barn Conversion Brick Floor After Cleaning Great Green Thurston

For regular cleaning I recommended the use of Tile Doctor Neutral Tile Cleaner, as this is pH balanced it will ensure that the newly applied sealer is not compromised by the use of a strong cleaning product. It has a nice fresh fragrance and a small amount goes a long way. They were happy they would now be able to keep the floor clean and have asked for me to come round once a year to maintain the floor.


Professional Restoration of a Brick Tiled Floor in Suffolk

Brick Floor in Barn Conversion in Great Green Read More »

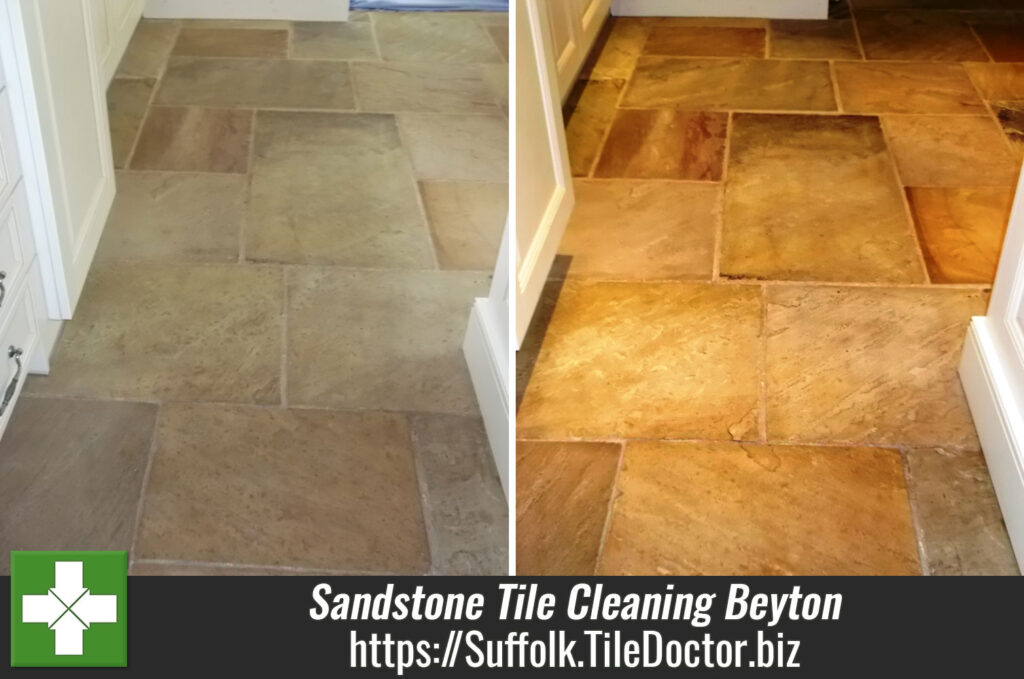
Sandstone floor before after sealing

Sandstone Tile Cleaning in Beyton

We were called into Clean and Seal 36m2 of Sandstone tile flooring installed in the Kitchen, Utility, Hallway and Cloakroom of a house in the Suffolk village of Beyton. The sandstone floor tile was laid around 10 years prior, the tiles had never been sealed and despite regular cleaning the riven surface had become a natural home for dust and grime.

Sandstone Tile Cleaning

Cleaning the floor was straight forward using a dilution of Tile Doctor Pro-Clean which is a very effective and flexible cleaning product recommended for natural stone surfaces, it was a large area so we used around 5 litres in total. We washed the floor down with clean water to remove any remaining product and then left it to dry over night.

Sandstone floor before sealing Sandstone floor before sealing

Sealing Sandstone Tile

The sandstone tile sealer we chose for the floor was Tile Doctor Colour Grow, it leaves a matt finish as opposed to a shiny polished effect but it does bring out the colour in the Sandstone tile, we used around 5 litres of sealer to complete the floor.

Sandstone floor after cleaning and sealing Sandstone floor after cleaning and sealing


Cleaning and Sealing Sandstone Tile Floor

Sandstone Tile Cleaning in Beyton Read More »

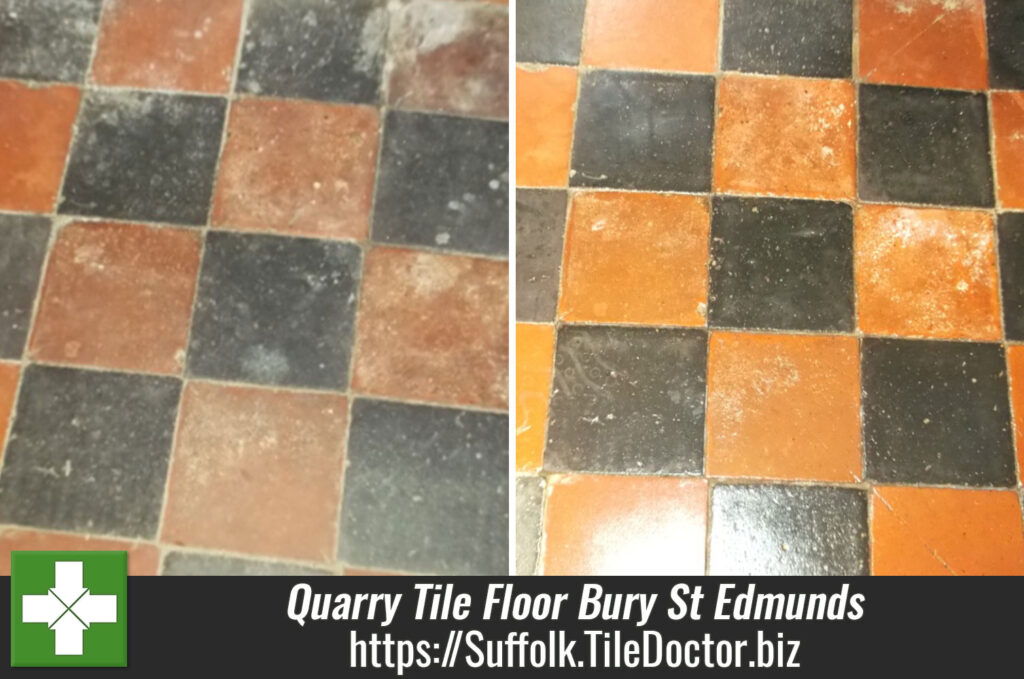
Quarry tiled floor before after

Diamond Laid Quary Tile Floor Restoration

Quarry Tile Floor in Bury St Edmunds

This 10m2 old quarry tiled floor laid in diamond pattern was in the hallway of a lovely thatched cottage, once part of the Hengrave Hall estate, had not been sealed for several years and was in need of restoration. Hengrave Hall itself is a Tudor mansion, located just north of Bury St Edmunds and in the heart of the picturesque village of Hengrave. It’s an imposing country mansion with beautiful gardens and offers a perfect venue for Weddings.

Quarry Tiled Floor Before Restoration Quarry Tiled Floor Before Restoration
Quarry Tiled Floor Before Restoration

Cleaning the Quarry Tiled Floor

The floor was given a thorough clean using a litre of Tile Doctor Pro-clean which is a concentrated, multi-purpose high-alkaline cleaner, stripper and degreaser designed for use on Quarry Tiles and then left to dry overnight ready for sealing the next day.

Quarry Tiled Floor After Restoration Quarry Tiled Floor After Restoration
Quarry Tiled Floor After Restoration

Sealing the Quarry Tiled Floor

The next day we sealed the floor using 5 coats of Tile Doctor Seal & Go which provides both a stain resistant surface seal and a durable low-sheen finish; we found 1 litre of the product was sufficient for the job.

Quarry Tile Floor Restoration in Bury St Edmunds, Suffolk

Diamond Laid Quary Tile Floor Restoration Read More »

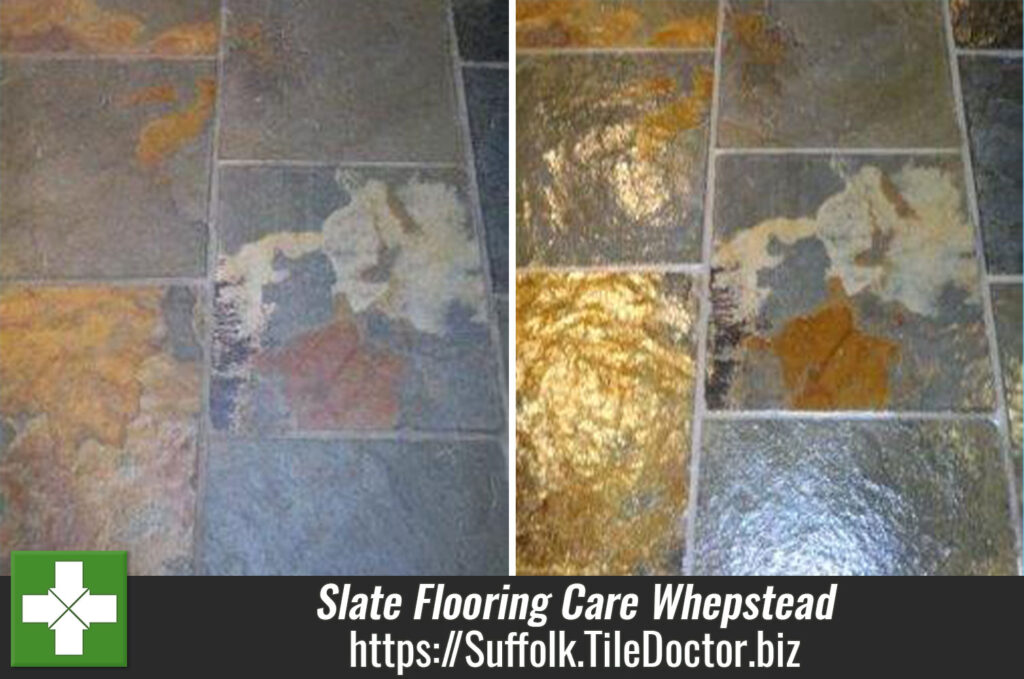
Slate Floor After Restoration

Slate Flooring Care

Slate Flooring Care in Whepstead

Some details below of a cleaning and sealing job we we did on a 43m2 Slate Floor in a kitchen/utility room in Whepstead, Suffolk.

Slate Floor Care Before Restoration

This beautiful slate floor had been sealed several years ago, the sealer had worn and it was in need of some slate flooring care. The floor was cleaned with Pro-clean, it was a reasonably large and it tool around 2 litres to get it clean. We then left it to dry overnight and came back the next morning to seal it using 6 x coats of Seal & Go consuming around 2 litres of the product.

Slate Flooring Care applied in Whepstead

Slate Flooring Care applied in Whepstead, Suffolk

Slate Flooring Care Read More »

=================================

Suffolk Tile Doctor

================================= Read More »

Scroll to Top