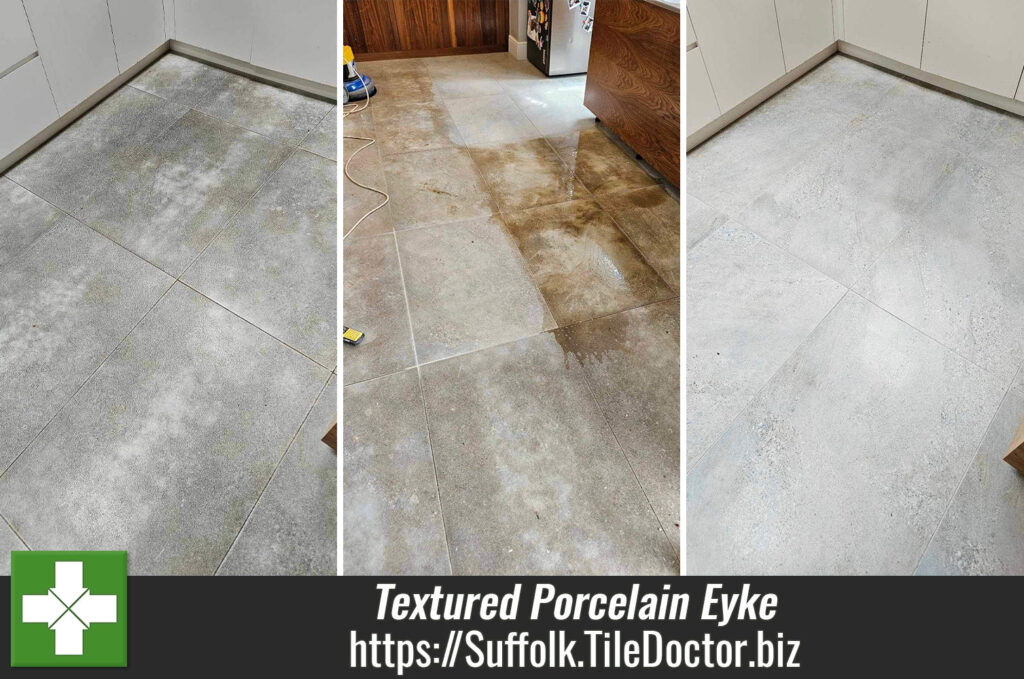
Deep Cleaning Textured Porcelain Floor Tile and Grout in Eyke
This Textured Porcelain tiled floor was installed in a house in the small village of Eyke. The customer was tired of the tile and grout looking dirty and so decided to have the floor professionally cleaned. Although textured porcelain is less likely to result in a slippery surface, it does trap dirt easily and this will build-up over time.
 |
 |
I visited the property to survey the floor and quote for its renovation. After taking measurements I carried out a cleaning demonstration on a small area of the floor to show how well the floor would come up. They were very happy with the result and agreed to go ahead with the work, so a date was booked in the diary for the following month.
Cleaning a Textured Porcelain Tiled Kitchen Floor
To get the Porcelain tile and grout clean it was initially sprayed with a strong dilution of Tile Doctor Pro-Clean, which is our go to tile and grout cleaner. The solution was left to soak in for roughly ten minutes before being worked in with a black scrubbing pad fitted to a rotary floor machine. These pads can struggle to reach into the recesses of the grout lines, so this was followed up by scrubbing the grout by hand with more Pro-Clean and wire brushes.
The floor was then rinsed with water and the resultant slurry removed with a wet vacuum. The work was done in sections and once a section had dried it was inspected and the cleaning process repeated until I was satisfied the floor was as clean as it could be. In total I spent a whole day at the property and used two litres of Tile Doctor Pro-Clean to get the tile and grout clean. The customer was thrilled that we had managed to get the floor looking like new again.

Normally at this stage my next step would be to seal the floor, however these Porcelain tiles were not the micro-porous type and therefore won’t accept a sealer and so no further treatment was required. Not being porous will ensure the dirt can’t get into the pores of the tile and will remain on the surface where it can be removed with regular cleaning. Had they been the porous variety we would have returned the following day when the tiles had dried to apply a sealer.
 |
 |
Although not porous the textured nature of the surface will trap dirt so they will need more regular cleaning. With this in mind, I left a complimentary bottle of Tile Doctor Neutral Cleaner for the customer to use to maintain their floor.
Professional Cleaning of a Textured Porcelain Tiled Kitchen Floor in Suffolk
Deep Cleaning Textured Porcelain Floor Tile and Grout in Eyke Read More »